 How to extract DVD audio tracks to MP3? How to extract DVD audio tracks to MP3?
iSofter DVD Audio Ripper Deluxe provides a simple, fast method to extract DVD audio tracks and save as Mp3 or Wav format. Using it, you are able to get audio tracks out from a DVD with ease.
iSofter DVD Audio Ripper Deluxe supports convert DVD to MP3, WMA, WAV, iPod Audio (m4a), AC3, AAC, and MP2. And it can not only rip DVD chapter by chapter, but also can feel free to rip by custom size or time.
How to get audio tracks on earth? It's simple, please follow the next steps:
Step1. Download iSofter DVD Audio Ripper Deluxe from http://www.qweas.com/download/video_dvd/dvd_rippers/isofter_dvd_audio_ripper_deluxe.htm and run. Load DVD, directly press the "DVD" button , then select your DVD Drive in the pop-up window and press the "Play" button.
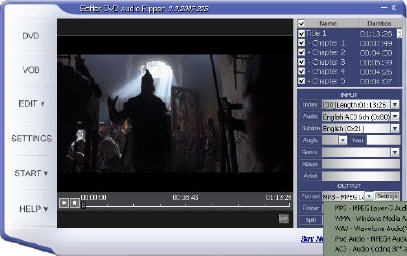
Step2. After you successfully load the DVD, the DVD info is displayed in the right window. Sometimes some chapters/episodes hide in another index, you can change an index in "Index" dropdown box to load these chapters/episodes.
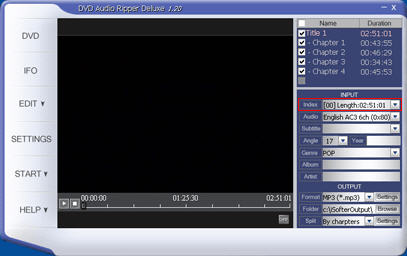
Step3. You can select the audio track for the target files in the "Audio" combo-box in the Input area.
Step4. You may edit ID3 tag by entering the info in the "Genre", "Album", "Artist" and "Year" boxes. MP3 format supports ID3 tag while Wave format doesn't.
Step5. Select the target audio format in the "Format" combo-box in the Output area. If you choose "MP3 (*.mp3)" as the output format, iSofter DVD Audio Ripper Deluxe allows you to specify the audio quality by clicking the "Settings" button. In general, you'd better keep the default value, that's enough to reserve wonderful audio quality.
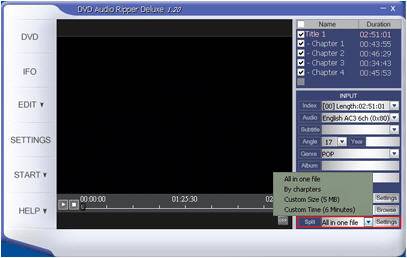
Step6. In general, DVDs are ripped by chapters. Especially to music DVDs, a chapter is a song.
If you prefer to split DVD audio tracks by certain file size, please select "Custom Size" in the "Split" box. You may enter the specifying number by clicking "Settings" button. The default is "5 MB".
If you want to rip by certain duration, please select "Custom time", you may enter the specifying number by clicking "Settings" button. the default is 6 minutes.
Step7. You may specify the output path by clicking "Browse" button or directly entering a file path in the "Folder" box at the bottom of the Output area.
Step8. With all settings being properly done, choose "Encode" in the "START" menu to start ripping.
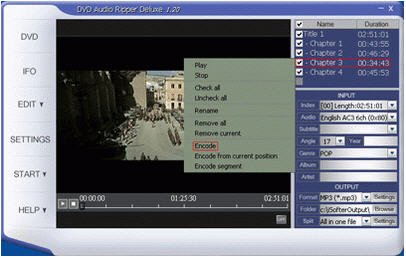
If you want to encode from a specific starting point, firstly, you must change "Split" to "Custom size" or "Custom Time", then choose "Encode From Current Position" in the "START" menu.
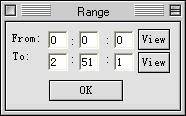
If you want to encode a segment, please choose "Encode Segment" in the "START" menu, then enter the beginning time and the duration of the clip. For example, you want a clip from 00:00:00 to 02:51:01, you should enter From 00:00:00 to 02:51:01, after that, click the "OK" button.
Step9. After the file is successfully ripped, you may click the " Folder" button to browse the output files.
Note: During ripping, please don't run other large programs to avoid ripping speed being lowered.
Related Software Step by Step Guides
and Tutorials:
How to rip DVD and put DVD on Zune step by step?
How to convert MIDI to WAV with MIDI to MP3 Converter ?
How to convert MP4 to MP3 with ImTOO MP4 Video Converter?
How to transfer music and video between iPods?
How to convert DVF to MP3, DVF to WAV with DVF converter?
How to remove audio track from media file?
How to convert MP3 to OGG or convert OGG to MP3?
How to cut or split MP3 files with MP3 splitter?
DRM converter to convert DRM iTunes M4P to MP3 OGG WMA step by step guide.
How to convert DTS wav to MP3 with DTS to MP3 converter? what is DTS?
|

 RSS Feeds
BBS Forum

 RSS Feeds
BBS Forum
