 How to capture screen, make video
guide with Screen Capture software?
 Do
you ever feel annoying with writing guide? Do you know how
to make a video guide with screen recorder? Does anyone
would like to make a video guide but do not know which screen
recorder to choose and how to achieve it? Do
you ever feel annoying with writing guide? Do you know how
to make a video guide with screen recorder? Does anyone
would like to make a video guide but do not know which screen
recorder to choose and how to achieve it?
RenderSoft
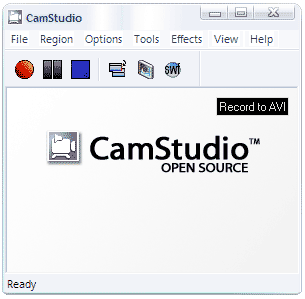
CamStudio is a Screen Capture software to capture screen
activity into standard AVI video files. If you move the
cursor, launch a new program, type some text, click a few
buttons, or select some menus, anything that you see on
your screen, this screen recorder will be able to record
all these and allow you to play them back later on.
The Features of CamStudio include:
* You can use it to create demonstration videos for any
software program
* Or how about creating a set of videos answering your most
frequently asked questions?
* You can create video tutorials for school or college class
* You can use it to record a recurring problem with your
computer so you can show technical support people
* You can use it to create video-based information products
you can sell
* You can even use it to record new tricks and techniques
you discover on your favourite software program, before
you forget them
Now let's learn how to make a video guide with screen
recorder
Step1. Download
RenderSoft CamStudio. Install it.
Step2. Setting Regions of video
guide
To capture screen you should set the Input Region first.
This allows you to define the area and type of video guide.
From the main menu, choose Region. There are 3 types of
regions you can choose:
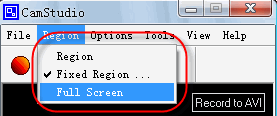
1) Region
Before the screen recording starts, you can define an arbitrary
rectangular region with the mouse.
Tip: The cursor turns into a pen on cross-hairs, which you
use to define a rectangular region on your screen by click-dragging
the left mouse button.
2) Fixed Region
You can capture screen in a fixed-size rectangular region.
A dialog allows you to define the size of the region in
pixels.
3) Full Screen
The screen recorder will capture the full screen to make
your video guide.
Step3. Setting Video Options.
Open the video option panel.
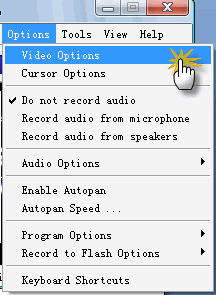
Setting the video options allows you to optimize your screen
capture by choosing between the file size, quality and frame
rates of your video guide.
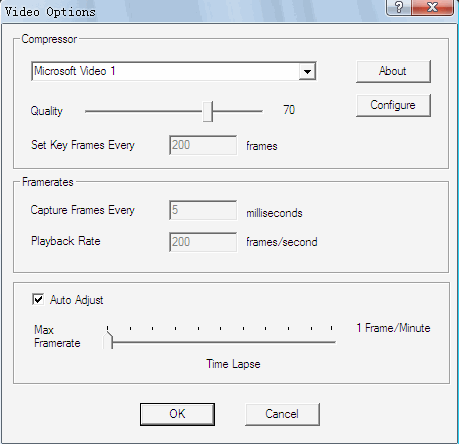
Step4. Setting Audio Options
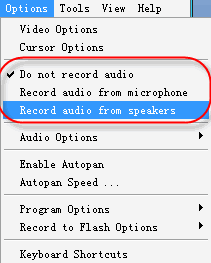
1) Recording Audio from Microphone
You can add a soundtrack to your video guide by selecting
this option. When enabled, CamStudio will record your voice
input from the microphone while it is capturing screen.
You need a sound card with an attached microphone to use
this option.
2) Recording Audio from Speakers
By selecting this option, CamStudio will record the output
from your speakers while it is capturing screen. This is
ideal for recording a gaming session or a movie stream.
You will need a sound card with speakers attached to use
this option.
Step5. Start the recording
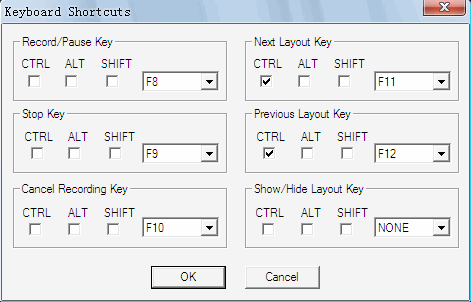
There are two methods to start the screen capture. One
is clicking the “Record” button. The other way is press
the shortcuts key. The default starting key is “F8” and
stopping key is “F9”.

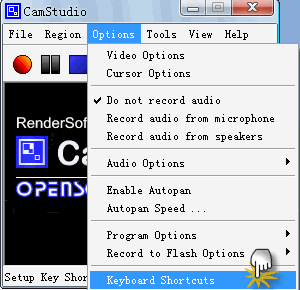
Tip: You can set the shortcut key at “Keyboard Shortcut”
panel.
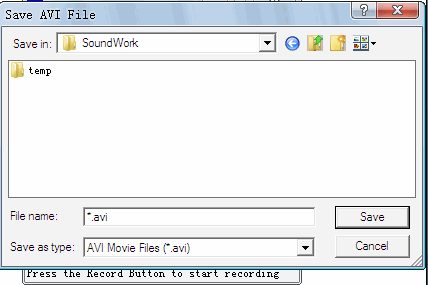
When you finish the screen capture, click the stop button
or press the shortcut stop key. CamStudio will ask you the
video guide name and destination to save.
It is the end of the guide. Do you know how to make a video
guide now? Many screen recorders can capture screen to make
a video guide. But different screen capture software have
different features, therefore which screen recorder to select
depends on your favorite. Try it now!
Related Software Step by Step Guides
and Tutorials:
How
to capture or record digital audio?
How
to save/download/capture/rip/record RTSP streams?
How
to capture or convert DVD movie to Bitmaps(bmp) image step
by step?
How
to capture/record Youtube Video?
How
to capture Streaming Windows Media Video Clips?
How
to capture/download Podcasts?
How
to Capture SWF Flash Files from Webpages with Infine Capture
Flash?
|

 RSS Feeds
BBS Forum

 RSS Feeds
BBS Forum
