 How
to Set up Your Computer for Home Networking? How
to Set up Your Computer for Home Networking?
Microsoft Windows XP makes it easy to configure your computer
for home networking. The Network Setup Wizard walks you
through the process, asking you for information one item
at a time. After you add your computer to your home network,
you'll be able to print to a printer on your home network
(the printer will no longer need to be attached directly
to your computer), and to access the other computers and
devices connected to your home network. You'll be able to
share files, which means you can get data from any computer
you connect to the network. You can even share one Internet
connection among all your computers.
Before you set up your computer for home networking, make
sure you have:
• Contacted an Internet service provider (ISP) to acquire
an Internet connection to your home.
• Installed a network adapter—wired or wireless—in your
computer.
To use the Network Setup Wizard to set up your computer for home networking, follow these steps on each computer in your home network
Step1: Log on as a member of the Administrators
group.
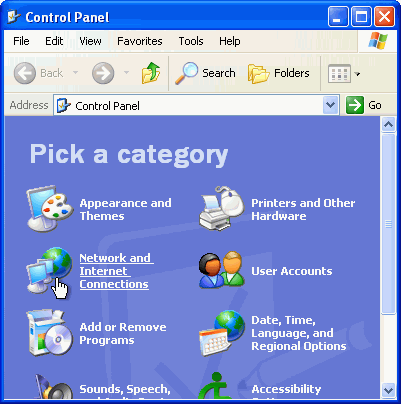
Step2. Click Start, and then click Control Panel.

Step3. Click Network and Internet Connections.

Step4. Under or pick a Control Panel icon, click
Network Setup Wizard.

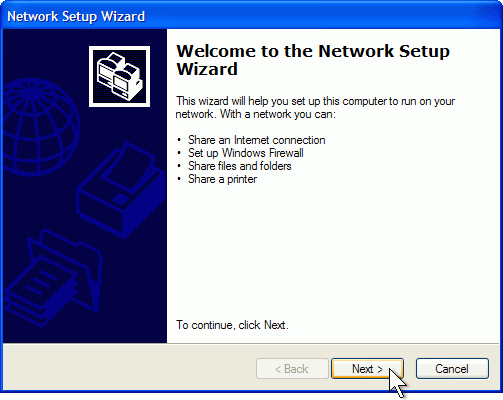
Step5. The Network Setup Wizard starts. On the Welcome
page, click Next.

Step6. On the Before you continue page, click Next.

Step7. If the wizard informs you that it has found
disconnected hardware, make sure your network adapter is
connected as described in Add a computer to your network.
It's okay to have a disconnected network adapter if you're
using a wireless network connection or if you connect to
the network using a USB (Universal Serial Bus) cable. If
you're sure everything has already been properly connected,
select Ignore disconnected network hardware. Otherwise,
connect your network cables, and leave the check box cleared.
Then click Next.

Step8. If you connect your computer directly to
the modem provided by your ISP, click This computer connects
directly to the Internet. If you connect your computer to
a router, click This computer connects to the Internet through
a residential gateway. If you're not sure, leave the default
setting. Then click Next.

Step9. If the Select your Internet connection page
appears, click Next.

Step10. On the Give this computer a description
and name page, type a computer description (such as "Kid's
Computer") and computer name (such as "Desktop").
Click Next.

Step11. On the Name your network page, type Workgroup.
Then click Next.

Step12. If you have files or a printer that you want
to share with other computers on your home network, select
Turn on file and printer sharing. Otherwise, leave Turn
off file and printer sharing selected. Then click Next.

Step13. On the Ready to apply network settings page,
click Next.

Step14. The Network Setup Wizard sets up your computer.
On the You're almost done page, click Just finish the wizard.
Then click Next.

Step15. On the Completing the Network Setup Wizard
page, click Finish.

Step16. When prompted to restart your computer,
save any open files, and then click Yes.

After your computer restarts, you'll be connected to the
network with the settings you provided.
Related Software Step
by Step Guides and Tutorials:
How
to convert AVI(DivX, XviD), VOB to SWF, FLV?
How
to convert MPEG WMV VOB MP4 AVI to iPhone Movies on Mac?
How
to Rip IFO, VOB to MP4?
How
to convert DivX to VOB?
How
to convert M2TS to MKV, AVI, MPEG, MP3, MOV, etc?
How
to rip subtitles from DVD-Video disc, rip subtitle from VOB/SUB
files?
How
to convert and burn VOB AVI to DVD step by step?
|

 RSS Feeds
BBS Forum

 RSS Feeds
BBS Forum
